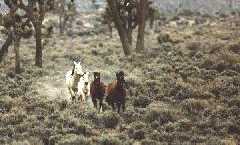
 Wild horse feet are a product of a combination of genetics and lots of use over
hard terrain as young horses mature and their feet develop. The end result is usually a very
durable and easy to maintain foot.
Wild horse feet are a product of a combination of genetics and lots of use over
hard terrain as young horses mature and their feet develop. The end result is usually a very
durable and easy to maintain foot.
As a wild horse adopter you may have found it difficult to find a farrier to come out
and trim your horse. On the other hand you my have found someone to come out but the
farrier doesn't have a clue as to how a wild horse should be trimmed. Fortunately most
wild horse feet don't require experts to maintain them and increasing numbers of adopters
are doing their own farriery work.
This feature will provide you with the A-B-Cs of giving your wild horse a proper and
long lasting trim.
|
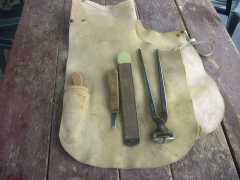
Most wild horse feet are very hard. You need good quality tools in order to cut through
them. We recommend purchasing high quality professional grade nippers, hoof knife and
and rasp. The cheaper nippers will be a struggle to use. Get a small round file in order
to keep your hoof knife sharp. We break the pointed tails off our rasps and wrap the ends
with vet wrap to avoid accidentally poking the horse in the belly with the point. A set of
leather chinks (farrier's chaps) with a hoof knife pocket will also make the job easier and
protect your pants from the rasp and nippers.
|
Basic Tools
|
|
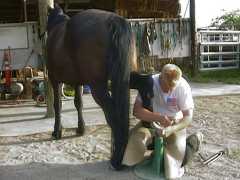
You will likely need to use two hands on the nippers and we have found it very useful
to have some kind of hoof stand to work from. The
Hoof Jack (right) is a commercially
available adjustable stand that comes with a sling and a pedestal.
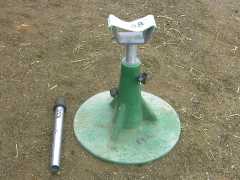
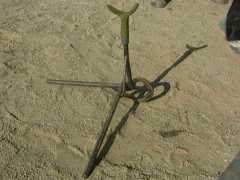
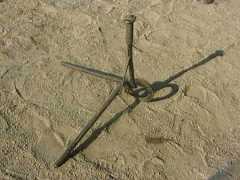
If you prefer you can make your own stand. The stand below was made using round and flat stock.
Each leg is a different height. The pedestal was made from an old rasp. The yoke and pedestal
slip over whatever leg is the correct height for the job. The yoke is wrapped with Vetwrap to
give it some padding.
|
The Hoof Jack
|
Homemade stand showing yoke attached
|
Homemade stand showing pedestal attached
|
|
|
BASIC PRINCIPLES OF TRIMMING
|
|
If you consider three important elements you should be able to do a good job trimming
your wild horse's feet.
| |
- Wild horses walk on the soles of their feet, not their hoof walls.
If you had long fingernails it would be very uncomfortable for you to
hold yourself up on the tips of your fingers when on "all fours." Your
fingernails are designed to protect the ends of your fingers, not bear weight.
The same goes for the wild horse's foot. He needs to bear weight on his sole.
- Wild horses need a short forward toe length and beveled edges
Natural wild horse feet resemble what's known as a "four point trim." They
have rather blunt toes and primarily bear weight on the four quarters of the hoof.
We need to be careful about not getting too much horizontal toe length when trimming
wild horses, particularly in the front feet.
In the domestic environment the wild horse will not wear down his hoof wall
nearly to the extent that he would in the wild. For that reason we need to bevel,
or round off, the bottoms of the hoof walls so that they will wear more appropriately.
Beveling also reduces cracking and chipping and allows enough hoof flexion to prevent the horse from becoming "sole bound."
Naturally the degree of beveling we would do would vary according to the use of the horse. If
a wild horse is used in rough country we might want to leave a little more hoof material
on the ground. In most applications, however, aggressive beveling of the hoof wall will
provide the most appropriate wear between trims.
- Wild horses need a balanced "touch down."
How your wild horse's foot strikes the ground will tell you what you need to
do to finish up your trim. At a brisk walk the foot should strike down just
slightly heel first and be even on the medial-lateral (inside-outside) axis.
If he touches down slightly toe first, his toe needs to be taken back a bit
more. If his foot rocks to the inside or outside when he touches down, the
edge that touches ground first should be trimmed off just a little more.
When the hoof glides onto the ground evenly with the heel kissing the ground
first, then you know you have it right.
|
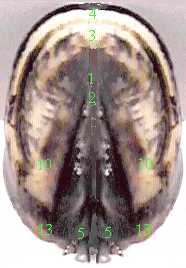
Anatomy of the hoof
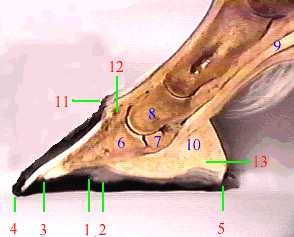
1 - Apex of Frog
2 -Duckett's Dot
3 - Tip of coffin bone
4 - Tip of horn growth
5 - Buttress of frog
6 - Coffin bone
7 - Navicular bone
8 - Short pastern
9 - Deep digital flexor tendon
10 - Digital cushion (Includes ungual cartilage)
11 - Coronary band
12 - Extensor process
13 - Heel
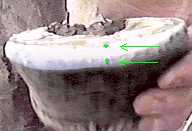
Beveled hoof wall
Walking the horse to check for
proper "touchdown."

|
|
If the horse's feet are trimmed so that he supports himself by his sole, his hoof walls
are beveled and his feet strike the ground evenly and slightly heel first, you will have
feet that will generally maintain themselves well and you will have a horse that is likely
to preserve his native balance and surefootedness.
|
Press Back to return to the page which brought you here
KBR Horse Health Information, © 1997 Lamm's Kickin' Back
Ranch and Willis & Sharon Lamm. All rights reserved. Duplication of any of this material for
commercial use is prohibited without express written permission. This prohibition is
not intended to extend to personal non-commercial use, including sharing with others for
safety and learning purposes, provided this copyright notice is attached.
Email us to submit comments or request reproduction
permission.
|