Collecting Traffic Signals
|
| REMOVING OLD PAINT |
|
Older traffic signals can be a challenge to restore. Hinges and latches can be frozen, fabric wire can be frayed and signals can have layers of sprayed on and brushed on paint of varying types and thicknesses that at times defy removal.
Removing layers of paint without damaging more delicate components can at times be challenging. The objective is to remove all of the paint but preserve an undamaged, unscratched original metal finish on which to repaint. Sand blasting and using a power wire brush can pit or scratch aluminum so often the best approach is to remove paint either with a glass bead blaster or using chemical paint strippers. This feature illustrates the methods that I use to safely strip layers of paint when restoring old traffic signals. |
|
|
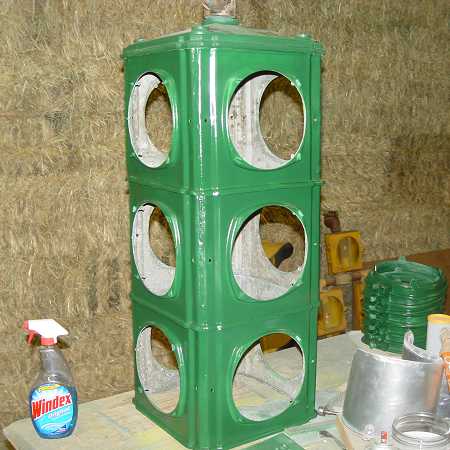
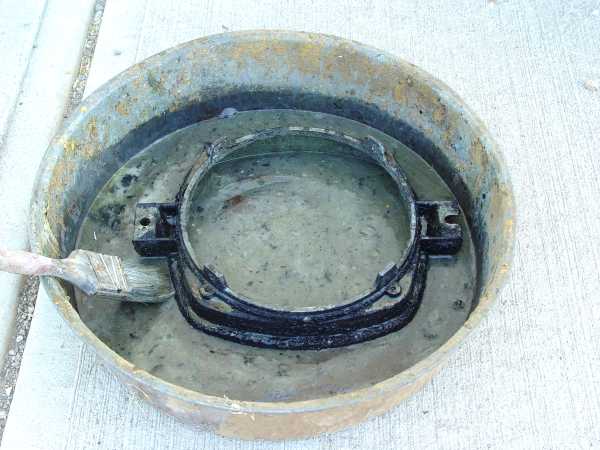
The first step is to break the project down into manageable pieces. With the old Crouse-Hinds DT in these photos, it made sense to strip and repaint the top and bottom plates while waiting for screws to loosen so I could take apart the rest of the signal. (Soaking stuck screws with a parts loosener called PB Blaster and modest heat from a MAPP torch will eventually cause most screws to release.)
As pieces are removed for stripping and repainting it is important to set up a stripping area in a well lit, well ventilated location where an errant splash of stripper won't cause any unexpected harm. (I tend to use a utility sidewalk that I can jet clean with a high pressure washer when I'm done.) Safety glasses and rubber paint stripping gloves are desirable also since some of the chemicals in the stripper can be pretty nasty if absorbed into the skin... plus the stuff burns! |
|
This portion of the information sheet shows a door off an old Signal Service Corporation signal being restored. It had a couple of layers of thick brushed on black paint over the original factory green paint.
Before starting I tested a small area with some stripper to make sure that the particular stripper I wanted to use would actually remove the paint. In this instance it worked so I was ready to set up my strip sequence. |
|
|
I strip small parts using an old oil drain pan and an inexpensive paint brush. By pouring some stripper into the pan, I can slightly immerse the part I'm cleaning. Any areas on the part that don't submerge can be liberally coated with stripper using the brush. I'll turn the part in the pan until the paint universally bubbles up.
Some of these stripping chemicals can burn the skin and are dangerous if splashed into the eyes, so reasonable care is necessary when stripping! (For this particular job, a product called Kleen Strip seemed to be quite effective.) |
|
|
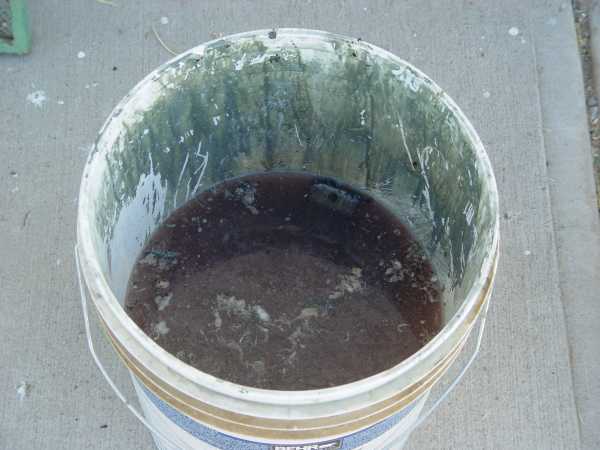
After the part has soaked and the paint is bubbling off, I'll remove the part from the stripper pan, shake off any excess stripper, and with a stiff nylon stripping brush knock off as much bubbled paint as I can.
Next the part goes into a bucket of a rich dilution of Butcher's Bare Knuckles floor stripper. The floor stripper will keep the emulsified paint soft and tends to soften up any remaining paint. Butcher's Bare Knuckles can usually be found at commercial janitorial supply houses. The mix of Butcher's shouldn't burn the skin but it's not a bad idea to wear rubber gloves in this part of the stripping process also. The dilution is a little caustic and the parts being cleaned can still have some stripper residue on them. |
|
|
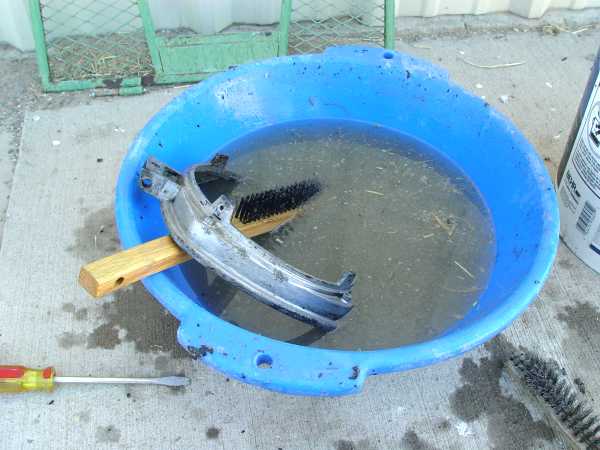
After soaking in the Butcher's Bare Knuckles the remaining paint on the part should be pretty soft. At this point I'll put the part in a rinse pan filled with clean water and go over the part with either a fine wire brush or a stiff nylon paint removal brush. (It's always good to test an area when using a wire brush as some aluminum parts can get scratched!)
This process involves brushing and rinsing until all the built up paint has been removed. All residue from the stripper and Bare Knuckles cleaner must be removed before priming and painting! |
|
|
|
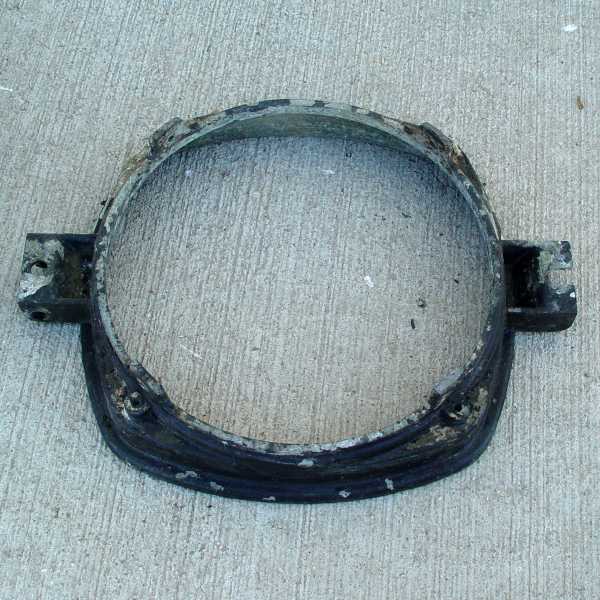
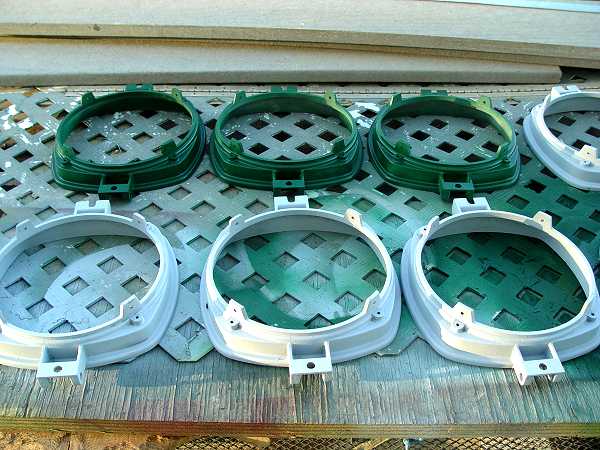
Here are what the porthole doors looked like after stripping. In this case most of the doors came clean enough to repaint after just one pass through the stripping process. A couple of the doors had some additional built up paint and required a second pass.
The various brands and formulas of paint remover seem to work better with some kinds of paints as opposed to other kinds of paint. Use what brand seems to work best for your job and follow the directions on the can. |
|
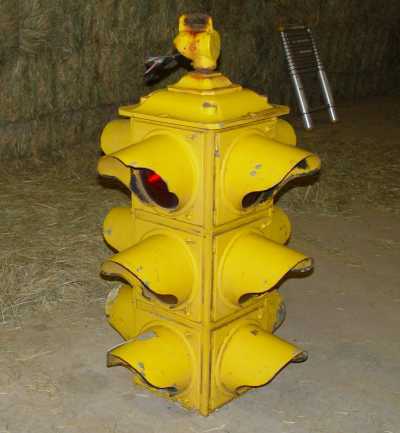
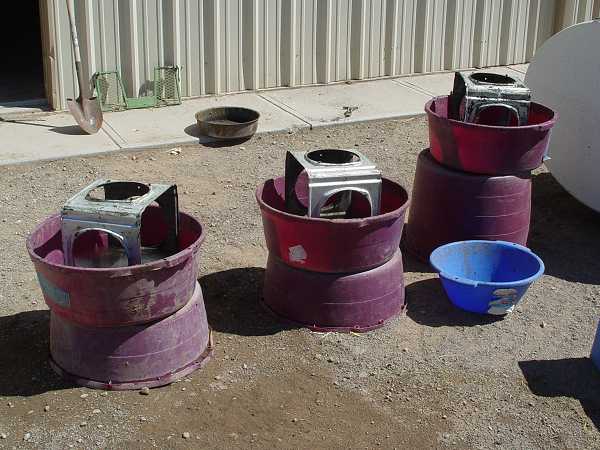
Here is the same three step process involving larger pieces.
|
Also remember that many old paints contained lead. Clean up and dispose of any paint residue when you finish the job - especially if young children visit or play in or around your stripping area!
Return to Signal Restoration Tips PageReturn to Signals Page |
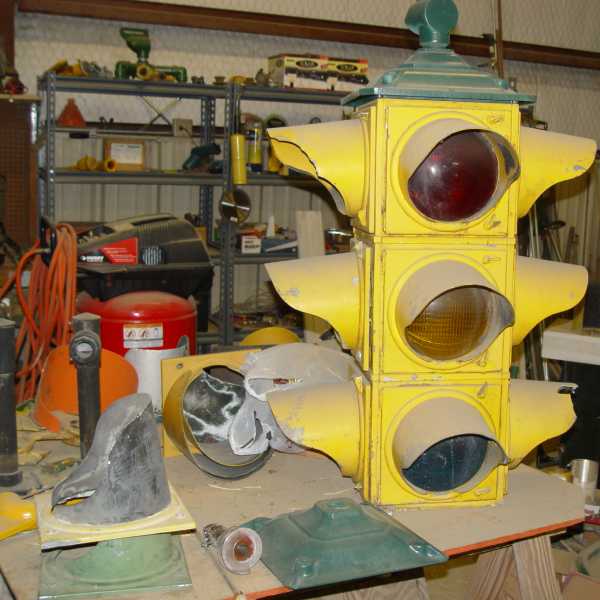
The finished job.
|